Saturday, July 21, 2012

Knights and Castles


I saw a picture of knights/guards made from egg boxes on craftypod.com and really wanted to have a go with Harvey hence the tentative link to a book. Next time though, I would like to make the guards from The Wizard of Oz... "OEO!"...


Activity: Egg Box Guards

Resources: An egg box (large), acrylic paint, flower and heart paper punch (but just a hole punch would do), black fine liner pen, scissors, glue or a glue gun.

What to do: 

1) Cut up an egg box so that you have four 'cups'. Two can be smaller than the other two.


2) Cut two of the smaller cups into a helmet shape and then put them all together to make the guard shape.


3) Paint the parts separately and wait for them to dry. (Sliver paint looks cool for the helmet and the armor)


4) Once dry, use a hole punch or craft punches to make shapes in the helmets and armor.


5) Use a glue gun or PVA to stick the shapes together and then add eyes using the paper from the hole punch and a smile with a pen.

ATTENTION!


Wednesday, June 20, 2012

Collage in the style of Lauren Child

Out & About!
Photomontage incorporates photographic images and pictures from print media into artwork. Lauren Child uses mixed media such as collage, magazine cuttings, watercolours, photography to create her modern illustrations. Her books include Charlie & Lola, the Clarice Bean novels, and Whose Afraid of the Big Bad Book?


Activity: 'Out and About' Collage.


Resources: 
magazines, assorted textured paper (you can buy packs of these from the dollar shop), scissors, glue, tracing paper or baking paper, pencil, eraser, black pen

What to do:
1)Get your textured paper out and have a look through it. Cut out lots of different photos of textures from magazines (carpet, grass, wood, fabric, sand, brick etc). Cut out a selection of hair, noses and eyes and anything interesting that catches your eye... 
textured paper
bits and pieces from magazines


2) Decide what kind of scene you want to make. A street, a garden, a park, a beach? Make a background by choosing appropriate coloured and textured paper and glueing it together. Add bushes or a road etc.


3) Choose some hair and place tracing paper or baking paper over it. Using a pencil, draw the shape of a face and neck onto the tracing paper.
3.


4) Turn the tracing over and trace over the lines on the back of the tracing.
4.


5) Turn the tracing back over, put it on paper that you want to use for the face and rub pencil over the lines. This will give you the face. Cut it out and glue the hair on. 
5.


6)Glue on and draw facial features. Here I drew the eyes and glued a mouth and nose that I had cut out. Use tracing paper for a guide to cut out the clothes from your magazine cut outs. 
6.


7) Gradually build up your picture using the tracing, cutting and sticking techniques!

7.


This activity can be adapted for all ages. Younger children can be given shapes already cut out to assemble and stick themselves and older kids can work independently.


Keep all your left over pictures in a folder to use for more collage work!


Inspiration for this activity: The Usborne Book of Art Projects


Info on Collage Illustrators: http://hearthomemag.co.uk/blog/artist-spotlight-4-of-the-best-collage-illustrators/

Pippi Longstocking - Lauren Child


Wednesday, June 13, 2012

Little Red Riding Hood


Hi everyone! It's great to be creating stuff again after a long holiday back to the UK! Here is an activity that you can adapt for any book...


Activity:  Little Red Riding Hood matchbox characters

Resources: 2 boxes empty boxes of safety matches, 4 matches (struck and blown out, get an adult to do this), colourful paper for the background, paper for the characters, scissors, paint (I used watercolour), blue tac, glue, black fine liner pen.


* Like many of my activities, this one is for younger kids with adult support and for older kids with no support (apart from striking the matches and blowing them out.)

What to do: 
 1) Choose a background paper and draw around a matchbox onto it.


2) Cut it out and stick it onto one face of your matchbox. Next draw around your match box again to make a box in which to draw your character.

 3) Draw a character in the box. It doesn't matter if it overlaps a side or two, it's actually better if it does.

 4) Paint your characters carefully.

 5) Use blue tac to stick the matchstick legs into the box.


6) When your character is dry, outline in with a black fine liner. Then cut it out and stick it on with the bottom slightly overlapping the bottom on the box. (I added a frilly skirt using another piece of paper). Now Put the matchbox together and...Voila!


Tip: Have a go at making different characters from your favourite stories! You could even make a setting for your story from a shoe box, using the same technique.

Sunday, April 29, 2012

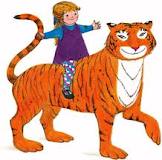
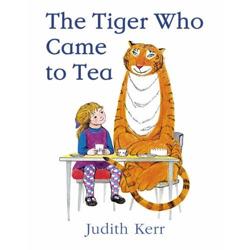
The Tiger Who Came To Tea by Judith Kerr


I remember reading this book over and over when I was little! I loved the fact that Sophie couldn't have a bath because the tiger had drunk all the water in the taps.

Activity: Make a tiger!

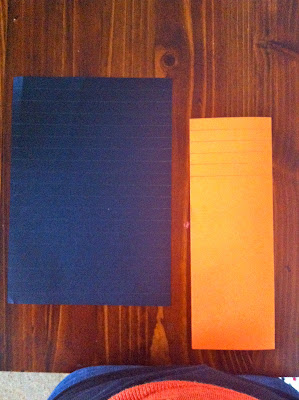
Resources: black, orange, red and white A4 paper or card, scissors, glue, ruler, eraser.

What to do: 
1) Using a pencil and ruler divide paper into 1.5 cm strips.
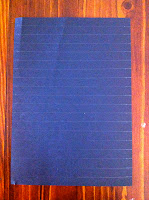

1.


2) Do the same with the orange paper to make 4 strips, then fold the paper lengthways and cut out the strips. They should be 1.5 cm in width and half 10.5 cm long. Do this with the white paper too.


3) Cut the white and orange strips out and start to glue them onto your black paper, using the pencil lines as guides. For the third orange strip, the one with the ears, add two circular shapes onto the end of an orange strip. To make the legs, use 4 cm long strips.

3.
4) To make the tigers jaw and mouth, Use a strip double the width of the others - (3 cm) and 14cm long. Draw and cut out the shape below in picture 4, and stick it on, above the legs.
4.

5.
5) Now for the head. With your orange paper, draw a shape like the one in Picture 6. It measures 6cm by 11cm. Cut out two 1.5cm wide strips as shown, to make the rest of each of those strips 7cm. Cut the shape out and make the sides of the strips that poke out, curved.
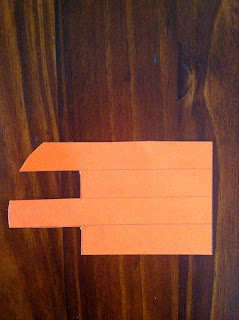
6.
6) Add two white stripes for the side of the face and make their side edge a little curved.

7.
 7) Add eyes and a nose and you are done! Oh and don't forget to rub out your pencil lines! :-)


I got the idea for this tiger from this Tom Eckersley print.

http://pinterest.com/pin/47076758575083851/


Tuesday, April 24, 2012

The Robot Book by Heather Brown


Activity: Recycled Robots

What to do:
1) Look through your recycling tub and choose boxes, tubes and tins. Ask an adult to make sure the tins have no sharp edges.

2)  For a nice effect paint your containers and tubes with Gesso (a surface primer for painting) and let them dry before you paint with undiluted poster or acrylic paint. This will stop the print from the packages showing through. If you have it, mix some gel medium in with your paint for a glossy finish. If not, you can paint a thin layer of PVA glue over your finished robot if you want to.


3) Paint all your robot components.

4) Once they are all dry, use glue to stick them together to make your robot. If you have a glue gun, this works well but get an adult to help as the glue could burn your fingers.

5) Use bits and bobs to decorate your robot. We used buttons and coloured matchsticks from the dollar shop.


6) For the small robots arms cut two different coloured strips of A4 paper (2 cm wide). Put the bottoms together to form a right angle. Glue them at the bottom. Then fold each piece over the top of the other until you have a concertina shape. Glue the ends. Make some pincers from aluminium foil and glue them on as hands and then glue onto the robot.

1.
2.
3.

Ta-Daa!

Other great robot books...